
The Roles page in Zeroplat is the central area where user roles are created, managed, and assigned. Roles are essential for defining access rights and permissions across the platform. They ensure that users only see and interact with the resources, workflows, and actions that match their assigned responsibilities.
Roles List
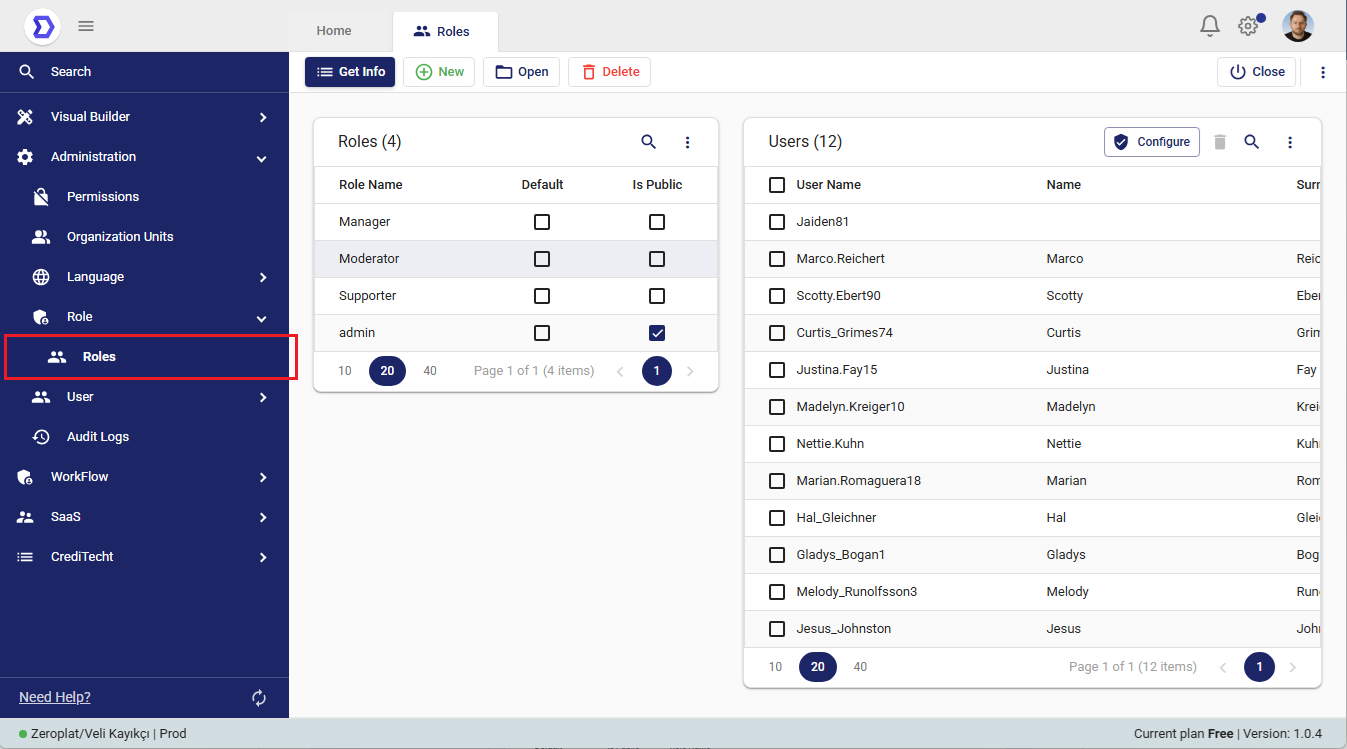
On the left side, you see the Roles list.
Each role has the following properties:
- Role Name – The name of the role (e.g., Manager, Moderator, Supporter, Admin).
- Default – If selected, this role will be automatically assigned to all newly created users.
- Is Public – Public roles can be visible to other users, allowing collaboration and visibility of role-based access.
On the right side, there is the Users list. This shows all users in the system. By clicking the Configure button, selected users can be assigned to one or more roles. This creates a direct relationship between users and their access rights.
Creating or Editing a Role
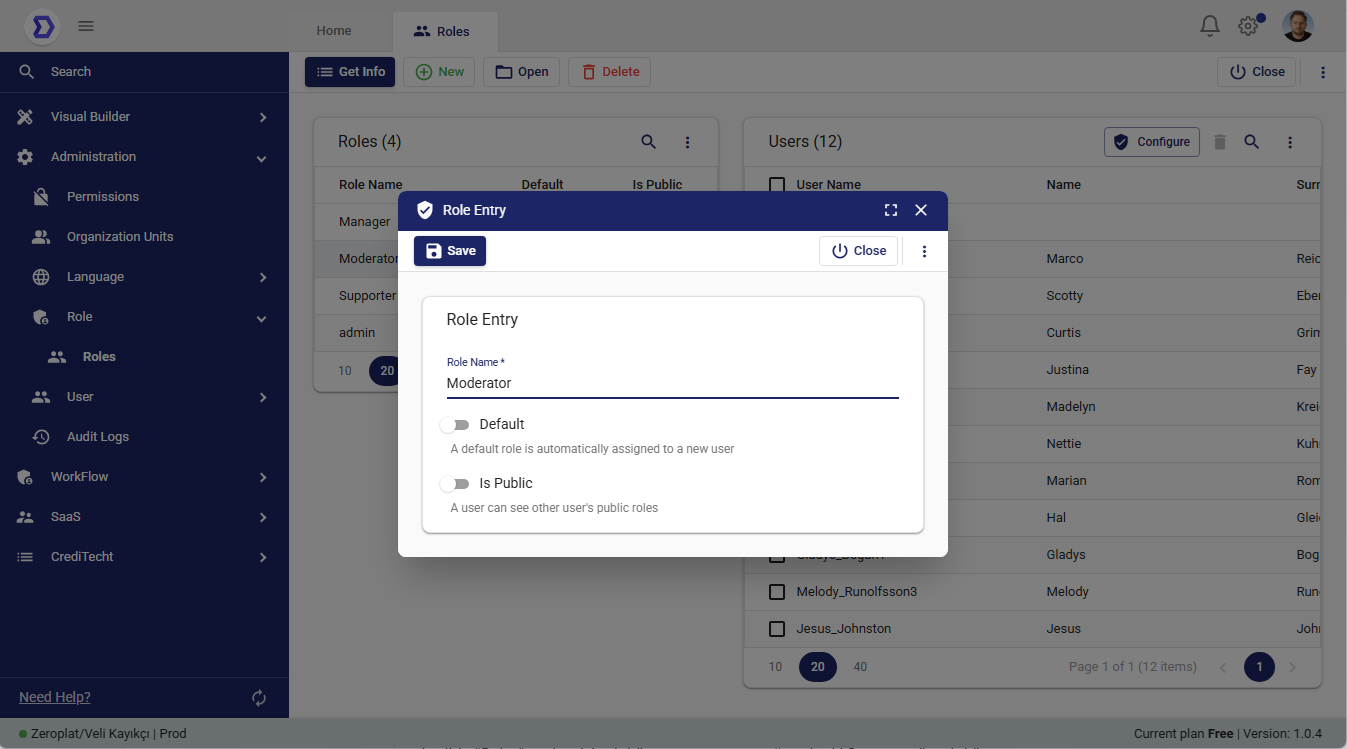
When you click New or open an existing role, the Role Entry screen appears:
- Role Name * – A required field where you define the name of the role.
- Default – If toggled on, this role will be automatically assigned to every new user.
- Is Public – If enabled, this role becomes visible to other users, allowing them to identify which roles exist in the system.
After filling in the information, press Save to confirm.
Best Practices
- Use descriptive names for roles (e.g., Manager Approver, Content Editor) so permissions are clear.
- Limit the Default role to only base-level access to avoid security issues.
- Assign roles carefully through the Configure button to ensure users only have the necessary rights.
- Combine Roles with the Permissions page for fine-grained access control.
📌 Summary:
The Roles page is where administrators define and manage user roles. Each role can be marked as Default or Public, and users can be linked to roles to inherit permissions. This ensures flexible, secure, and organized access management throughout Zeroplat.
Roles & Permissions Relationship
In Zeroplat, Roles and Permissions are tightly connected to provide a flexible and secure access management system.
How They Work Together
- Roles define who the user is (e.g., Admin, Manager, Supporter).
- Permissions define what actions that role (or user) is allowed to perform.
- A role without permissions is simply a label; it only becomes functional when permissions are assigned.
Process Flow
- Create a Role
- Example: Manager Approver.
- The role is added from the Roles page.
- Assign Permissions to Role
- Go to the Permissions page.
- Select an action (e.g., Salary request flow > Manager Approve > Approve).
- Configure it so the Manager Approver role has access to this action.
- Assign Users to Role
- From the Roles page, select the role.
- Use Configure to assign users to that role.
- Result
- Any user assigned to the Manager Approver role automatically inherits all permissions linked to that role.
- For example, if the workflow requires Manager Approve, those users will see the approval tasks in their Inbox.
Example Scenario
- A workflow step requires a Manager Approval.
- Permission: Salary request flow > Manager Approve > Approve.
- This permission is assigned to the Manager role.
- Users John and Sarah are added to the Manager role.
- ✅ Both John and Sarah will now see the approval request in their Inbox, and either can take action.
Key Benefits
- Centralized Management: Change permissions once at the role level, and all assigned users are updated.
- Scalability: Add new users by simply assigning them to existing roles.
- Flexibility: Permissions can also be given directly to users or organization units if needed.
📌 Summary:
Roles act as containers for permissions. By assigning permissions to roles and linking users to those roles, Zeroplat ensures a structured and efficient access control system. This is especially powerful in workflows, where approvals and actions are routed based on user roles and their assigned permissions.