
Overview
In Zeroplat, a Menu represents an item in the left-hand navigation panel.
Menus are used to organize and group different pages, dashboards, and components within the application.
By creating menus, users can structure their application logically and place related pages under the same navigation group.
Menu Properties
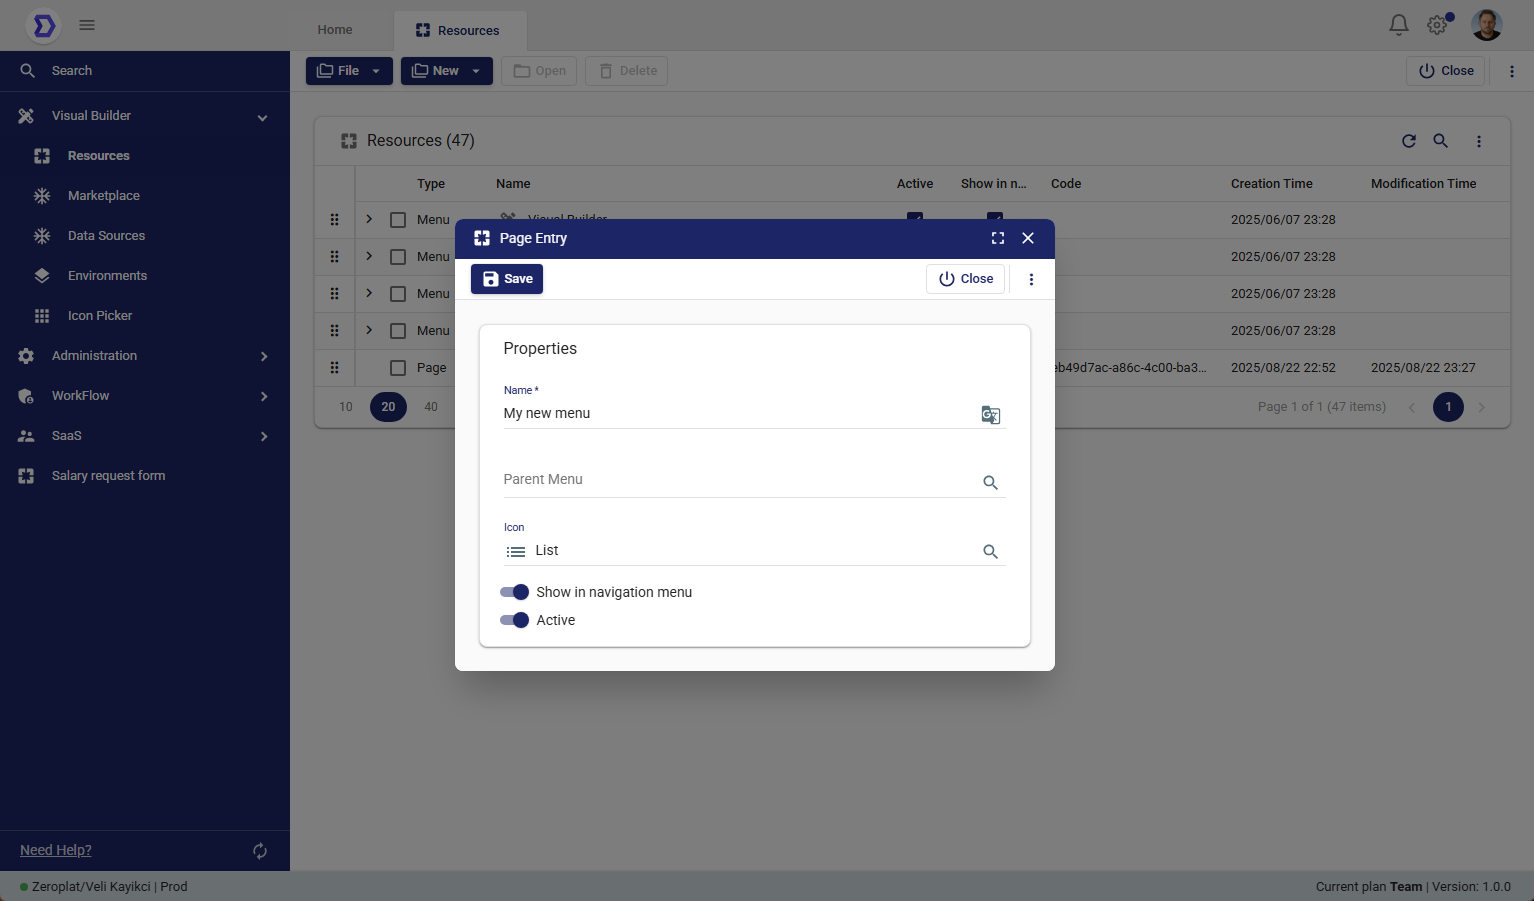
When creating a new menu, the following properties are available:
- Name*
The display name of the menu as it will appear in the navigation panel. - Parent Menu
Allows you to nest the new menu under an existing parent menu, creating a hierarchical structure.
If left empty, the menu will appear at the top level. - Icon
Choose an icon to visually represent the menu in the navigation bar.
This improves usability and provides a quick visual cue for users. - Show in Navigation Menu
Toggle this option to make the menu visible in the navigation panel.
If disabled, the menu will exist in the system but won’t be displayed. - Active
Controls whether the menu is active or inactive.
Inactive menus will not be usable by end-users.
Steps to Create a New Menu
- Navigate to Visual Builder → Resources.
- Click the New button and select New Menu.
- Fill in the required fields:
- Enter a Name for the menu.
- (Optional) Select a Parent Menu if you want to nest it.
- (Optional) Choose an Icon.
- Enable or disable:
- Show in Navigation Menu
- Active
- Click Save to create the menu.
Usage Example
- A top-level menu called Administration can contain submenus such as Users, Roles, and Permissions.
- Similarly, a Reports menu could contain submenus for Sales Reports and Finance Reports.
This hierarchical menu system makes navigation more intuitive for end-users.